None is exempt from making the mistake of deleting an important file and, after that, discovering there is no backup of it. Although the trash bin can offer a way to roll back such an operation, its feasibility relies on how the user interacts with the operating system. For example, a straightforward CTRL + Delete keystroke combination can bypass the bin trash as a first data recovery level. Regardless of the underlying system is proprietary or a free solution, there are many tools designed for helping users to recover dropped files. As one of the most popular free computational platforms in the world, Linux is not an exception when the subject is options for data recovering. Many of them are open source solutions that can be downloaded and installed from official repositories. Other ones are commercial tools prepared to run over any Linux-based operating system. We will take a look at two of those solutions and evaluate how each one works: TestDisk and R-Linux.
TestDisk
TestDisk is a free and open-source command-line tool for recovering deleted files on Linux. This software was written in C programming language by Christophe Grenier and licensed under GNU/GPLv2 license. It runs on main operating systems – Linux distributions, Windows, and macOS. The installation package can be downloaded through the button:
TestDisk DownloadConsidering Linux-based systems, it can also be installed through the respective default package managers. On Debian and Ubuntu, the following commands install TestDisk on the system:
$ sudo apt update
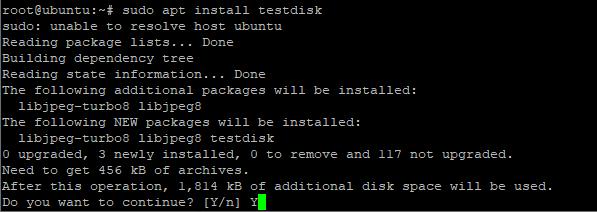
$ sudo apt install testdisk
If extra packages (dependencies) will be installed or if essential packages will be removed, the installation process can ask for a confirmation. Otherwise, TestDisk will directly be installed on the system.
To check the installation and additional information about the tool, the next command can be executed:
$ sudo dpkg -l testdisk

To install TestDisk On Red Hat Enterprise Linux (RHEL) and CentOS it is firstly required to enable/install the EPEL repository. It is an additional package repository that provides access to install packages for commonly used software. Depending on the CentOS version (7 or 8), the EPEL repository setting up is slightly different as shown by the two sets of commands (all commands must be executed with superuser privileges):
- RHEL / CentOS 7
# yum install epel-release
# yum update
# yum install testdisk
- RHEL / CentOS 8
# yum install https://dl.fedoraproject.org/pub/epel/epel-release-latest-8.noarch.rpm
# yum update
# yum install testdisk
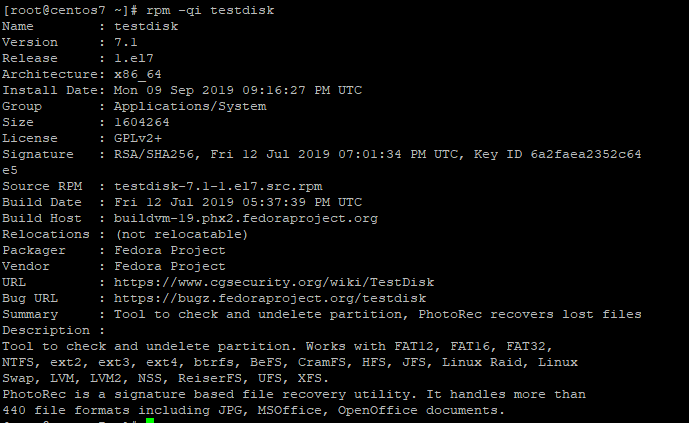
On RHEL and both versions of CentOS, the TestDisk installation can be verified by running the following command:
$ rpm -qi testdisk
Finally, the next commands can be used to install TestDisk on other two traditional Linux distributions:
- Fedora:
$ sudo dnf install testdisk
- Arch Linux:
$ sudo pacman -S testdisk
Once TestDisk is installed, the user can list all partitions and storage devices on the system through the command
# testdisk /list
To recover deleted files on Linux, it is just required to invoke the TestDisk tool without any parameter as follow
# testdisk

The invocation of TestDisk will display a command-line menu with three options related to logging information about the process of recovering deleted files.
- Create: it creates a new testdisk.log file.
- Append: it adds new logging information to an existing testdisk.log file.
- No Log: it does not generate any logging information.
Assuming the option of creating a new logging file was selected, next the TestDisk will list the disks and partitions deleted files can be recovered from. By selecting one item from the list and choosing the option “Proceed”, the system will ask to point out the corresponding partition type to be used. After the user presses ENTER, TestDisk will advance to show the list of operations that can be carried out on the partition.

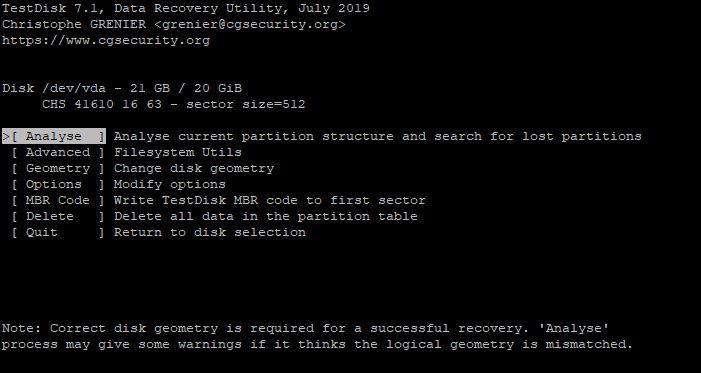
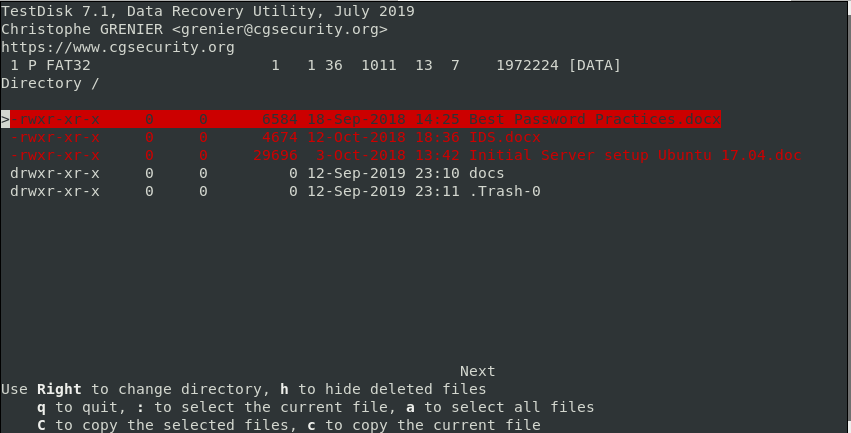
The “Analyse” option evaluates the selected partition and it shall be used for recovering data on Linux. If such a partition is no bootable, the tool will display a message informing the user about this. TestDisk offers two types of searching files: “Quick Search” and “Deep Search”. After selecting one of them and pressing “Proceed” again, the tool will list all partitions that can be scanned. The last step is to trigger the searching process. During this step, the tool updates the screen with each partition available for recovering files. By choosing one partition, all deleted files found on it will be highlighted and you can press the letter “C” to copy a dropped file to a specific directory.
R-Linux
R-Linux is another free utility distributed for Windows, macOS, and Linux (32 and 64 bits) operating systems. It also has a more complete solution, the R-Studio, which is paid and supports working with NTFS (New Technology File System) partitions. Different from TestDisk and other command-line tools, R-Linux comes with a friendly graphical user interface. It can be downloaded through the following button:
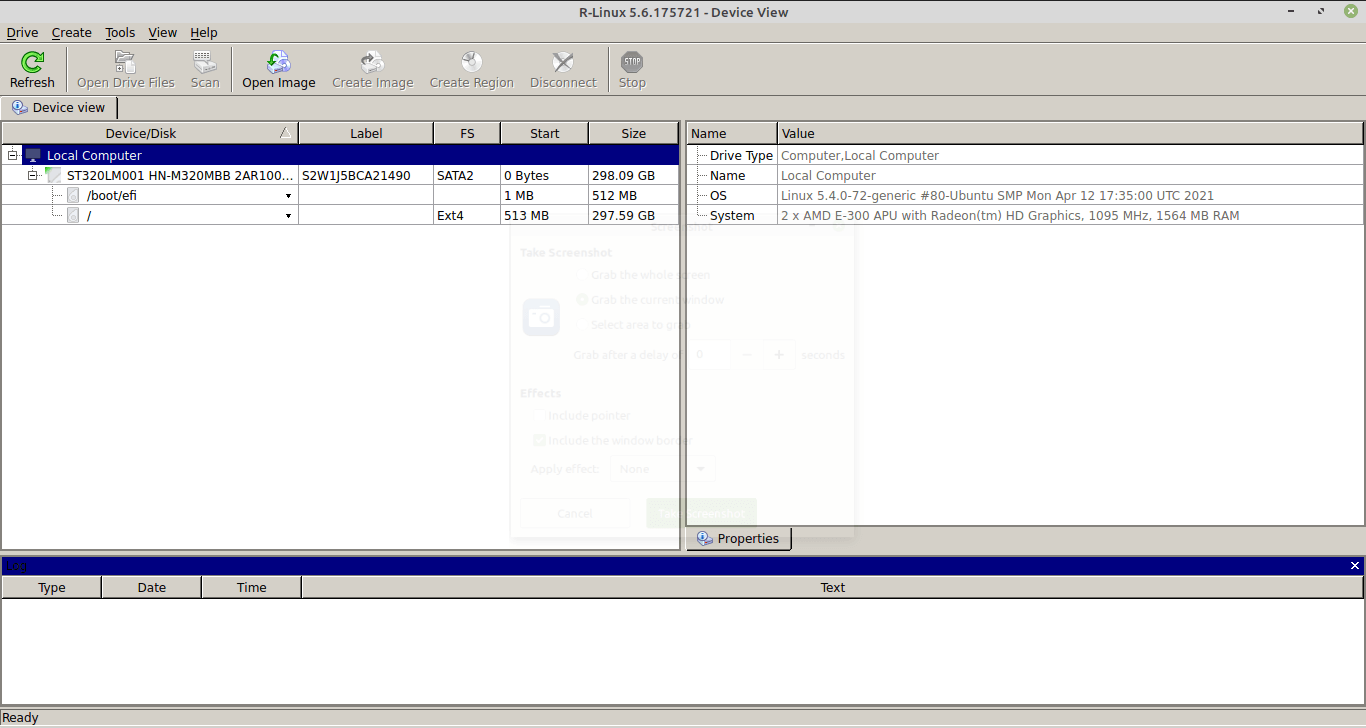
R-Linux DownloadAfter installing and opening the R-Linux, the first screen prompts the user to select the disk or partition from which deleted files will be recovered.
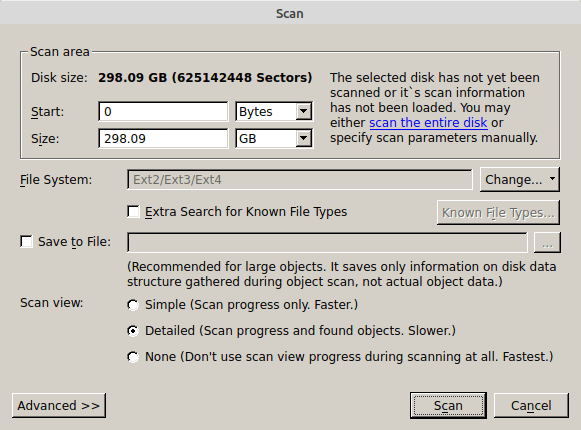
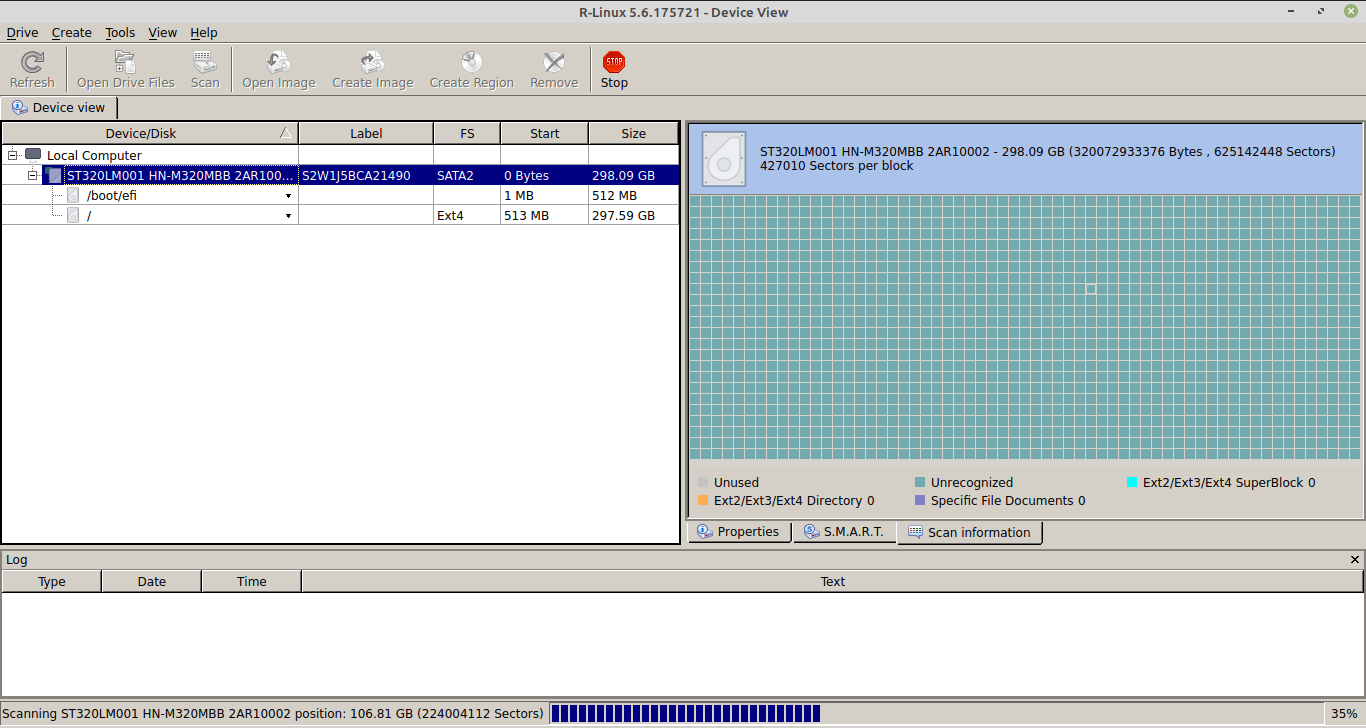
The next step involves triggering the scan process by pressing the corresponding button. R-Linux will ask the user to select the type of scanning to be carried out: Simple, Detailed, or None. The last one does not give a graphical view of the searching process for dropped files. In the same window of options, it is also possible to choose a specific area for running the scanning. Once the setup is finished, the process is started by pressing another “Scan” button. Next, R-Linux will display a kind of map of the disk that is being analyzed. This “map” makes it possible to follow the progress of the scanning process. This step can be interrupted at any time by pressing the button “Stop”.
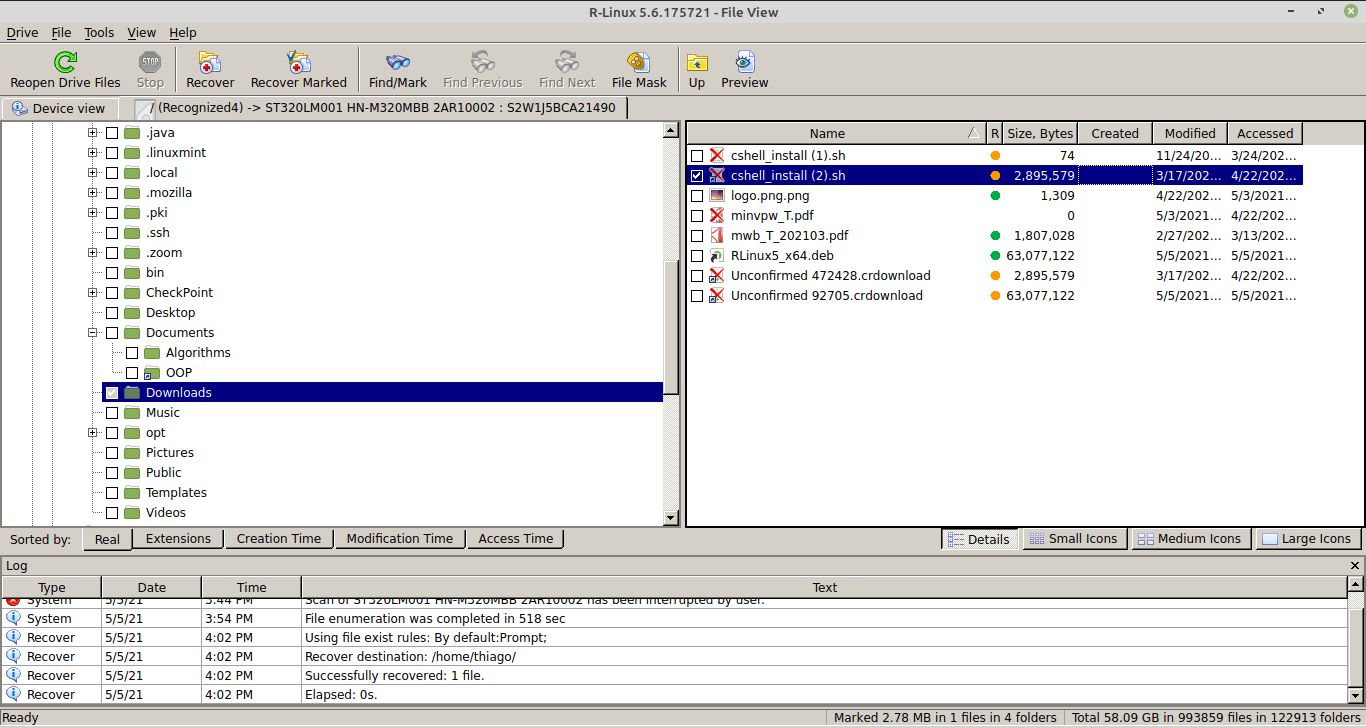
Since the scanning process is concluded, the two main options for accessing deleted files are:
- Click on the partition and select “Recover All files …”
- Select the option “Open Drive Files” and pinpoint the folders from which deleted files have to be recovered. Through this option, it is also possible to select specific files found by the tool. The buttons “Recover” or “Recover Marked” have to be pressed subsequently.
Summary – Recovering Deleted Files on Linux
There is a huge diversity of tools designed for recovering deleted files on Linux. Many of those solutions offer only a command-line interface that demands more proficiency from users with Linux. This is the case of TestDisk. Although it is a powerful solution, it does not hide low-level details about drivers and partitions. Another category of tools works like R-Linux by displaying a more friendly interface and facilitating users with any level of knowledge about Linux to interact with them.