It is quite common that we want to know how to take screenshots on Kindle devices. Sometimes we will need to capture important information on our Kindle Tablet, or capture a favorite book scene on our Kindle E-reader for sharing.
How to Take Screenshots on Kindle Fire, Fire HD, Fire HDX, and More
Who this part is for: using Amazon Fire Tablets 1st Generation to the latest generation, including the following models.
- 1st Gen (2011): Kindle Fire 7
- 2nd Gen (2012): Kindle Fire 7, Kindle Fire HD 7
- Gen 2.5 (2012): Kindle Fire HD 8.9
- 3rd Gen (2013): Kindle Fire HD 7, Kindle Fire HDX 7, Kindle Fire HDX 8.9
- 4th Gen (2014): Fire HD 6, Fire HD 7, Fire HDX 8.9
- 5th Gen (2015): Fire 7, Fire HD 8, Fire HD 10
- 6th Gen (2016): Fire HD 8
- 7th Gen (2017): Fire 7, Fire HD 8, Fire HD 10
- 8th Gen (2018): Fire HD 8
- 9th Gen (2019): Fire 7
…
Take Screenshots on Amazon Fire Tablets (3rd Gen and later)
Press and hold the volume down button and the power button together for one second.
You will see a screen flash and a smaller image of the screen will appear in the center indicating that you have successfully captured a screenshot. Now go to the Photos app and your screenshots will be live in the Screenshots album.
If you want to import screenshots to the computer directly, you will need to connect the Amazon Fire tablet to your Windows/Mac via a USB data cable.
On Windows: The screenshots are saved in Internal Storage > Pictures > Screenshots on the Fire device as PNG format.
On Mac: Install and launch Android File Transfer, which can be used to transfer files between Mac and Amazon Fire tablet. In the AFT window, the screenshots are stored in Pictures > Screenshots.

Take Screenshots on 2011-2012 Kindle Fire Tablets
It is quite difficult to take a screenshot of these older Kindle Fires. The main procedure is to enable ADB on your Fire tablet, install the Kindle Fire Driver, install Android SDK, connect Fire device to your computer, launch Dalvik Debug Monitor, choose the Fire device and screen capture from the top menu. Here are Amazon’s instructions. If necessary, you can also contact Amazon Technical Customer Service for help.
Take Screenshots on Kindle E-reader (Kindle Paperwhite, Kindle Oasis, Kindle 10, Kindle Touch, and So On)
Who this part is for: using Kindle E-Ink book readers 1st Generation to the latest generation, including the following models.
- First generation (2007): Kindle
- Second generation (2009, 2010): Kindle 2, Kindle 2 international, Kindle DX, Kindle DX international, Kindle DX Graphite
- Third generation (2010): Kindle Keyboard (also called Kindle 3)
- Fourth generation (2011): Kindle 4, Kindle Touch
- Fifth generation (2012): Kindle 5, Kindle Paperwhite 1
- Sixth generation (2013): Kindle Paperwhite 2
- Seventh generation (2014, 2015): Kindle 7, Kindle Voyage, Kindle Paperwhite 3
- Eighth generation (2016): Kindle Oasis 1, Kindle 8
- Ninth generation (2017): Kindle Oasis 2
- Tenth generation (2018, 2019): Kindle Paperwhite 4, Kindle 10, Kindle Oasis 3
…
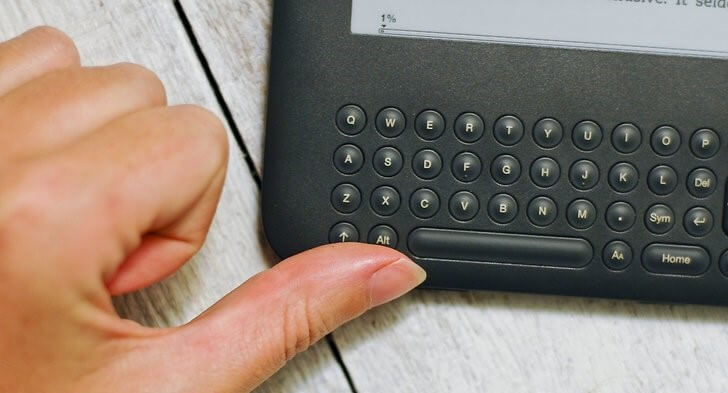
Kindle, all Kindle 2 and Kindle DX, Kindle Keyboard – Press and hold Alt-Shift-G on the keyboard. The Shift button is the Up Arrow next to Alt.
Kindle 4, Kindle 5 – Press and hold the keyboard button and then you press and hold the menu button.
Kindle Touch – Press and hold the home button, and then tap anywhere on the screen.
Kindle 7, Kindle 8, Kindle 10, Kindle Voyage, All Kindle Paperwhite and Kindle Oasis – Touch the two opposite corners on the screen at the same time. P.S. the future releases are expected to take screenshots in this manner. I will update this post if there is any change.
When taking a screenshot on Kindle, the blink indicates that your screenshot has been captured and saved. You probably have to press and hold about 5 seconds to see a flash if you are taking a screenshot on old Kindle models.
To check the screenshot, you just can’t check in the Kindle itself. So you’ll need to connect Kindle to the computer via a USB data cable. Screenshots will appear in the root directory or in the document folder. They are stored as .png files.