We take screenshots for a variety of reasons – to capture a funny moment, to show someone how to do something, to document our work, or simply because we want to save images of things we come across on the web or in apps. Whatever the reason, screenshots are an incredibly useful tool that can be used on any device with a screen.
On Mac, there are a few different ways to take screenshots. The key combination to use depends on what you want to capture – your entire screen, a specific window, or just a portion of the screen.
Once you’ve taken a screenshot, it’s automatically saved to your desktop. Over time, these screenshots can start to clog up your Mac’s storage space.
The size of a screenshot can depend on what you’re capturing and how much detail is in the image. Some may be as large as 6MB or more. If you want to free up some room, you can delete unwanted screenshots from your Mac.
Where Are Screenshots Saved on Mac?
By default, all screenshots you take on Mac will be saved to your desktop as .png files. You may group screenshots into stacks. This can be turned on with a simple checkbox in the right-click menu of your desktop.
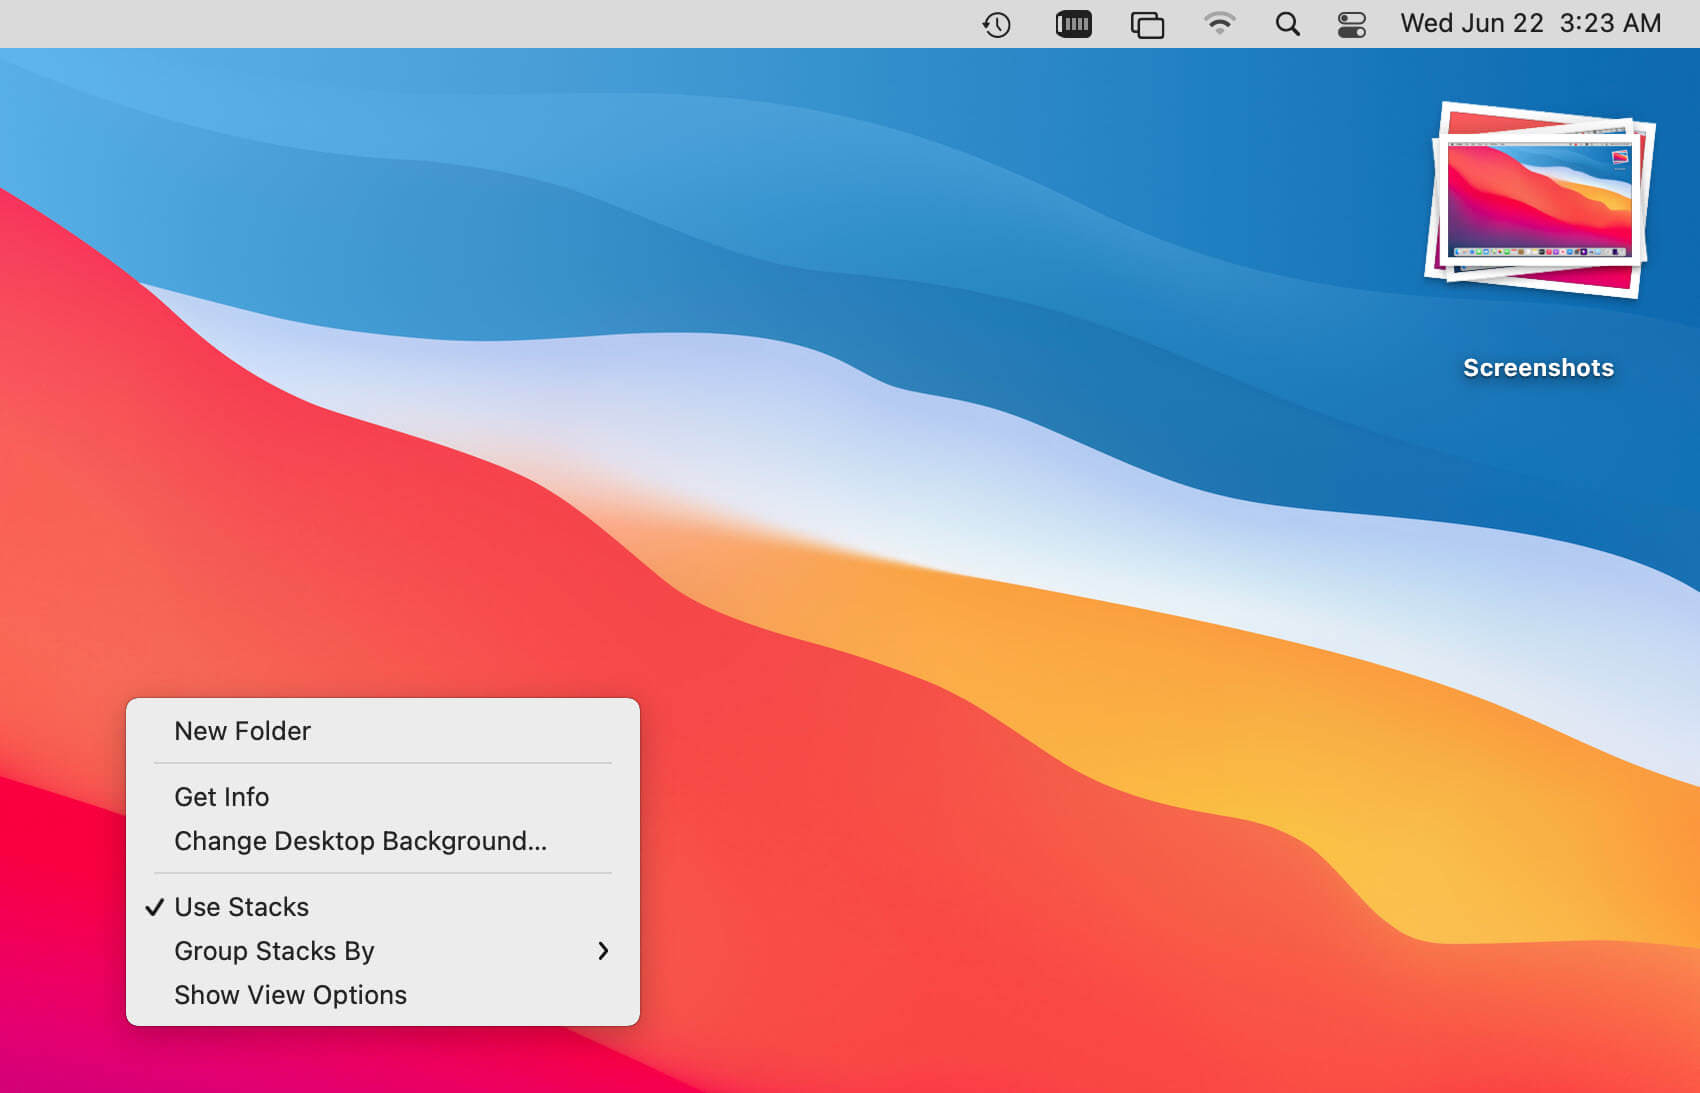
The stacking feature will group all of your screen captures together in one stack and allow you to expand them by clicking on the stack, making it simpler to find the screenshot you’re searching for and clean up your desktop in the process.
If you’d like to change where your screenshots are saved, you can do so by opening the Screenshot app (hotkeys Command + Shift + 5) and going to “Options”.
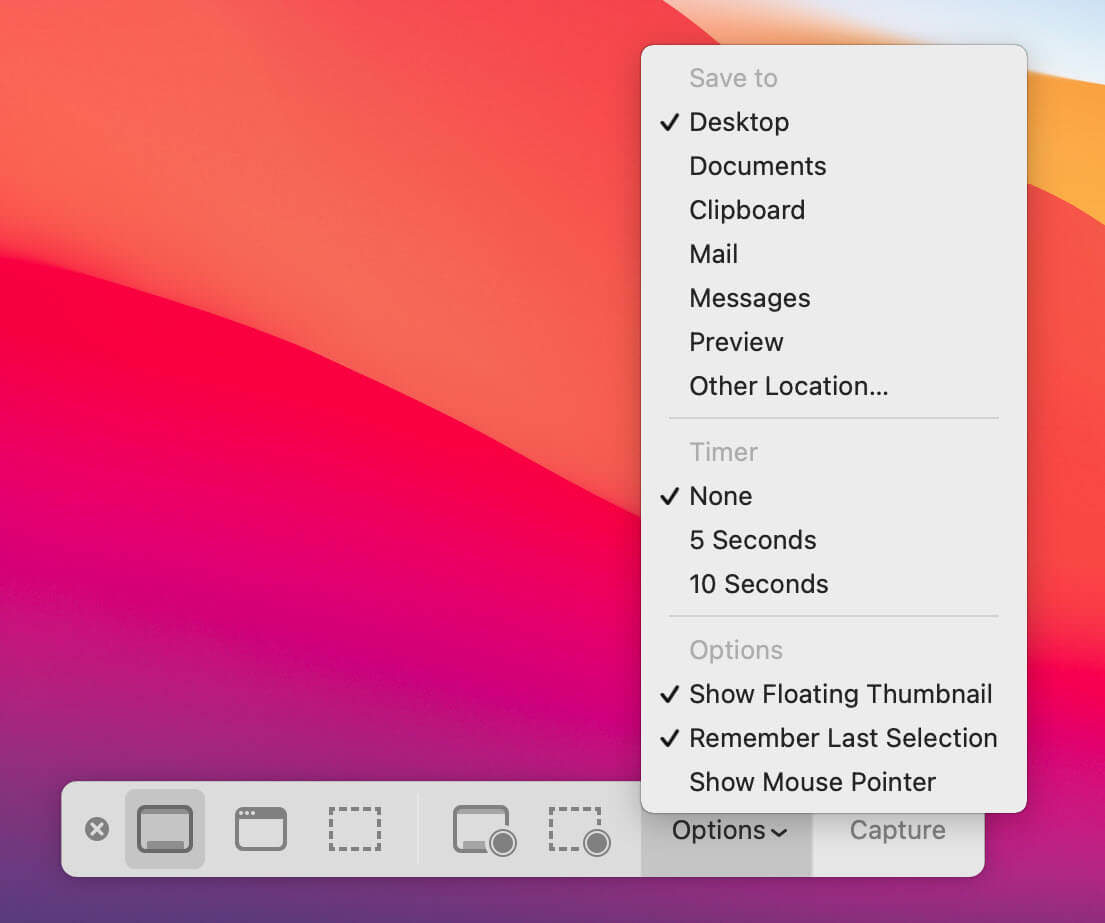
The “Save to” option will now be found in the drop-down menu, which will allow you to change where your future screenshots are stored.
How to Delete Screenshots on Mac?
Now that we know where screenshots are saved on Mac, let’s look at how to delete them.
The easiest way to delete a screenshot is to simply drag it from the desktop into the trash bin.
You can also select the screenshot (or multiple screenshots) and press Command + Delete on your keyboard. This will send the screenshot(s) to the trash bin as well.
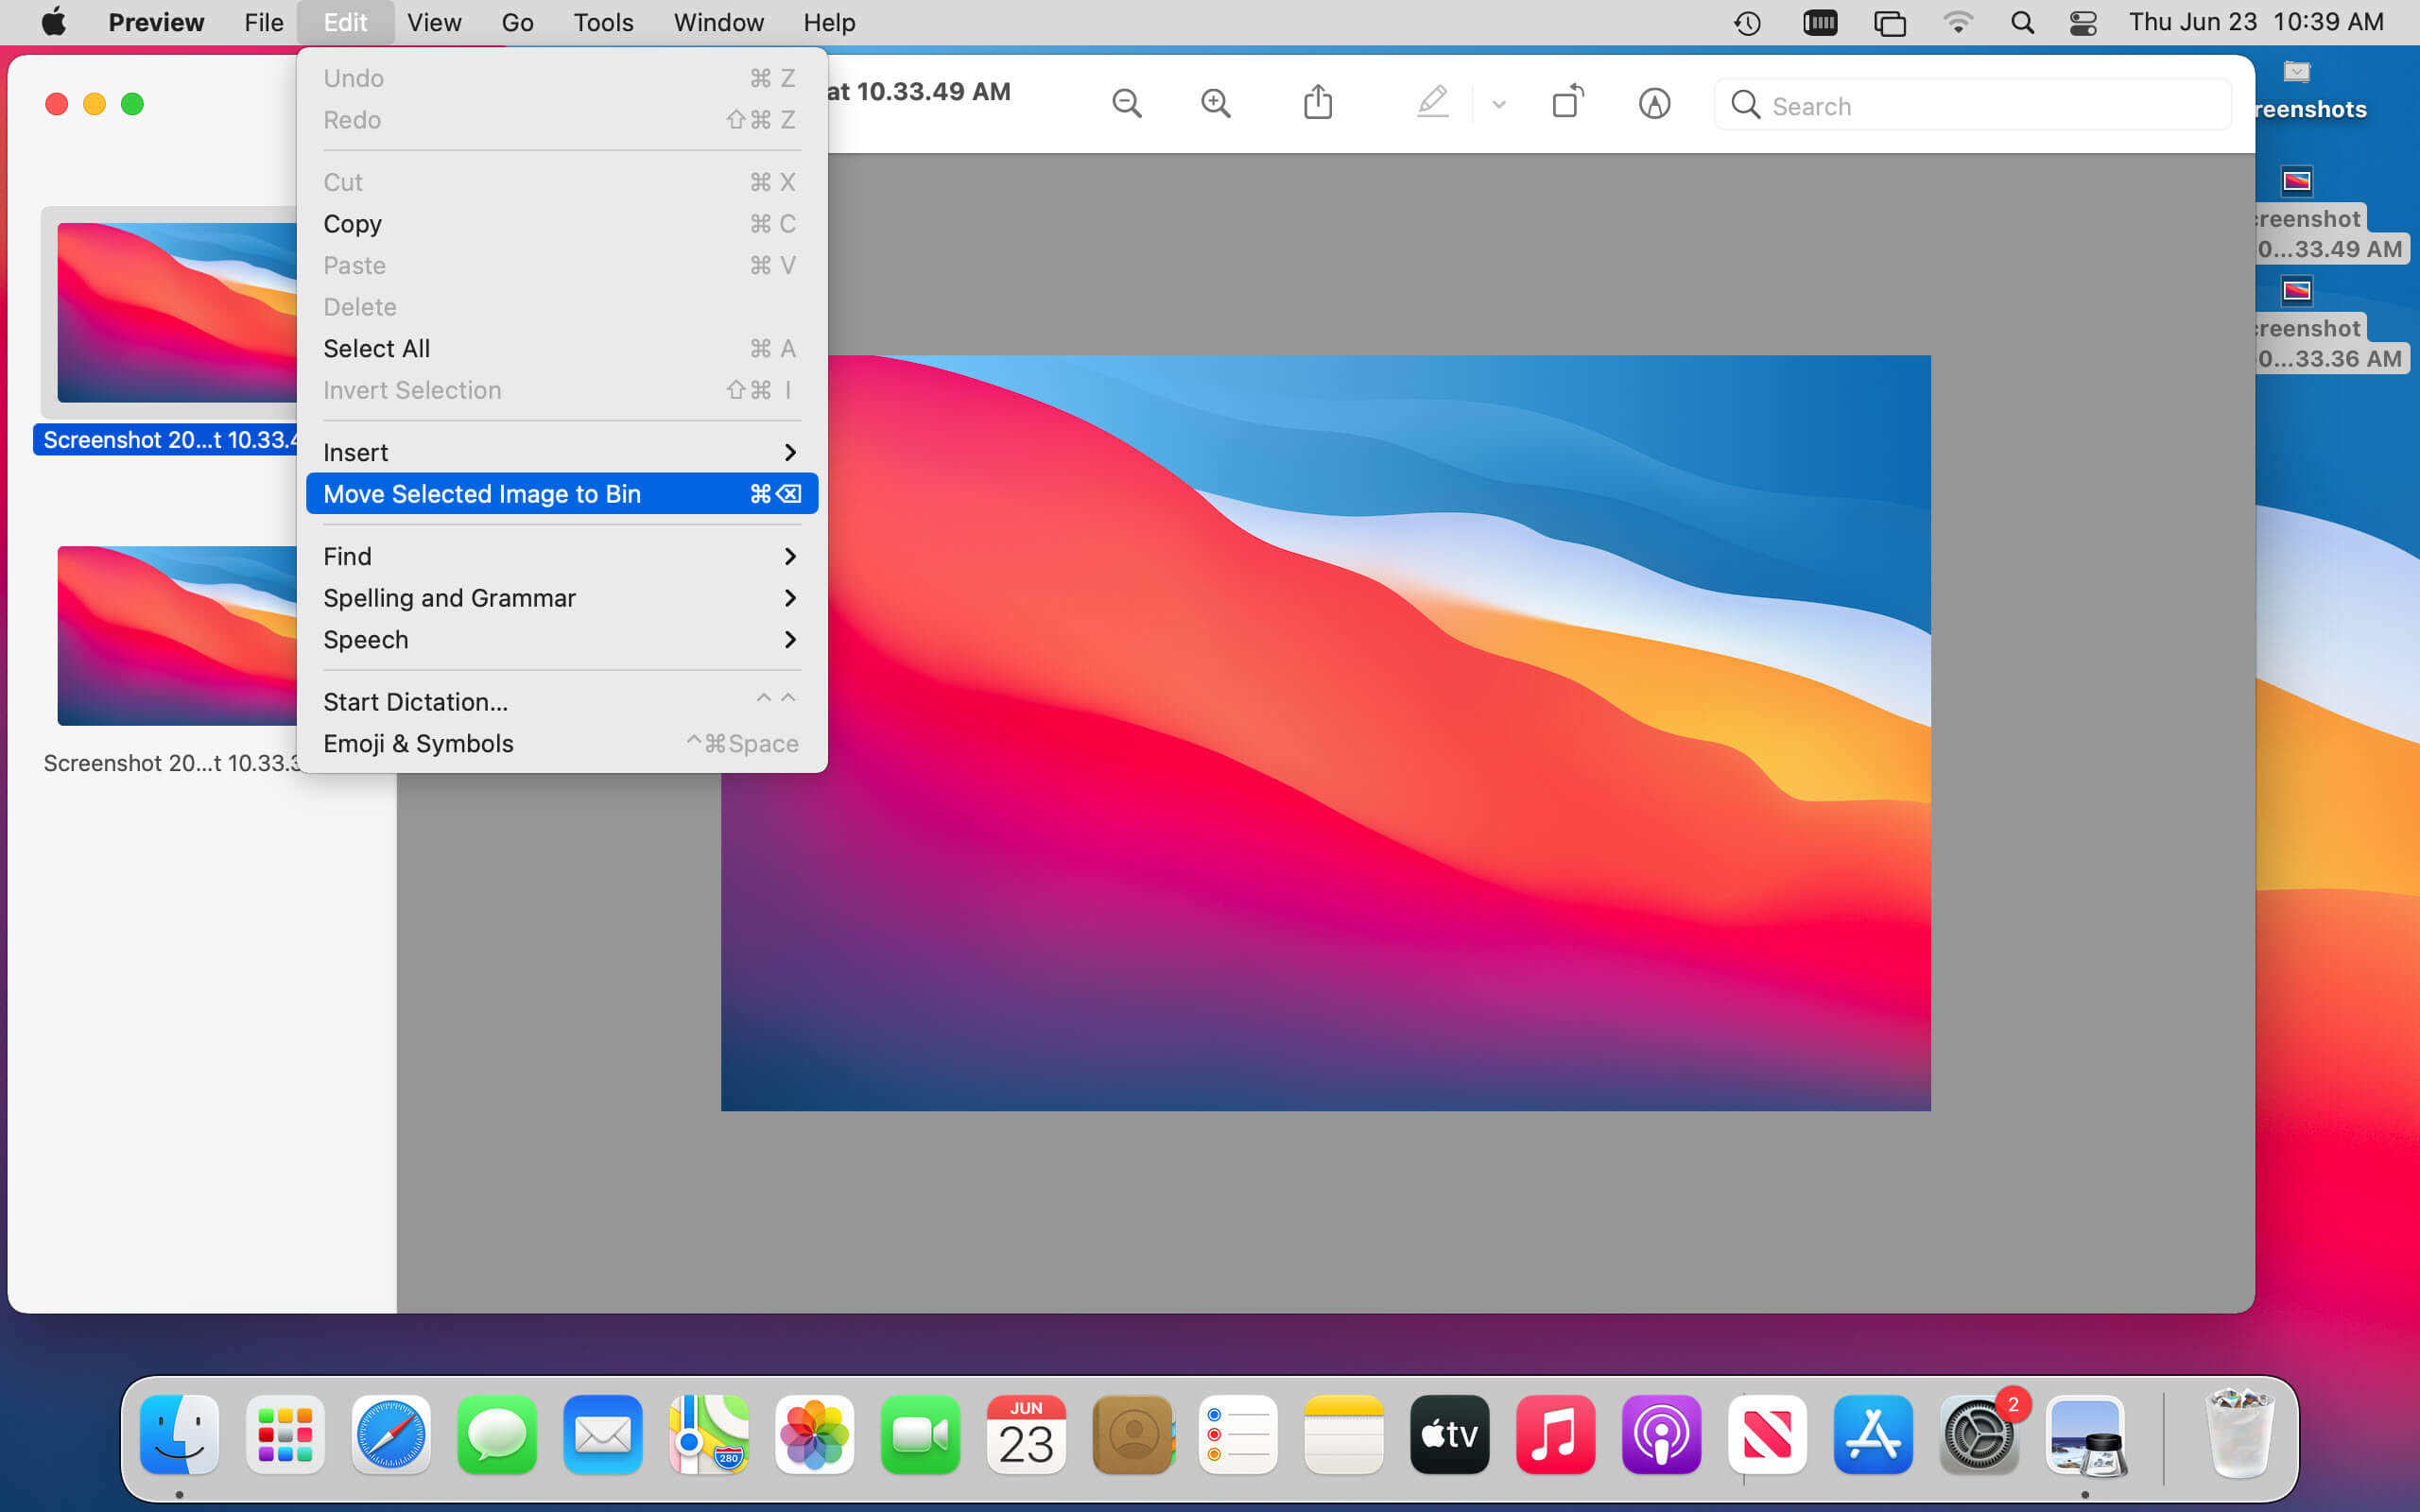
If you want to be more selective about which screenshots you delete, you can open them in Preview and delete them from there. To do this, select the screenshots and right-click on them. In the pop-up menu, select “Open With” and then choose “Preview”.
Once the screenshots are open in Preview, you can press Command + Delete on your keyboard or go to the “Edit” menu and select “Move Selected Image to Bin” from there. The screenshot you chose will be sent to the trash bin.
Screenshots that go to the trash bin are not actually deleted until you empty the trash. So after you have deleted the screenshots you no longer need, you can remove them all at once by right-clicking on the trash bin and selecting “Empty Bin”.
This will permanently erase the screenshots from your Mac and free up storage space in the process.
Why Can’t I Delete Screenshots on Mac?
If you’re having trouble deleting screenshots on Mac, there are a few things you can try.
First, make sure the screenshot is not open in any app. If it is, close the app and try deleting the screenshot again.
If that doesn’t work, try restarting your Mac and then deleting the screenshot. This can sometimes fix issues with deleting files.
If you’re still having trouble, CleanMyMac X can help. This app can delete stubborn files that won’t be deleted using regular methods.
Simply download and install CleanMyMac X, launch the app, and click on the “Shredder” feature in the left menu.
Try CleanMyMac X for Free
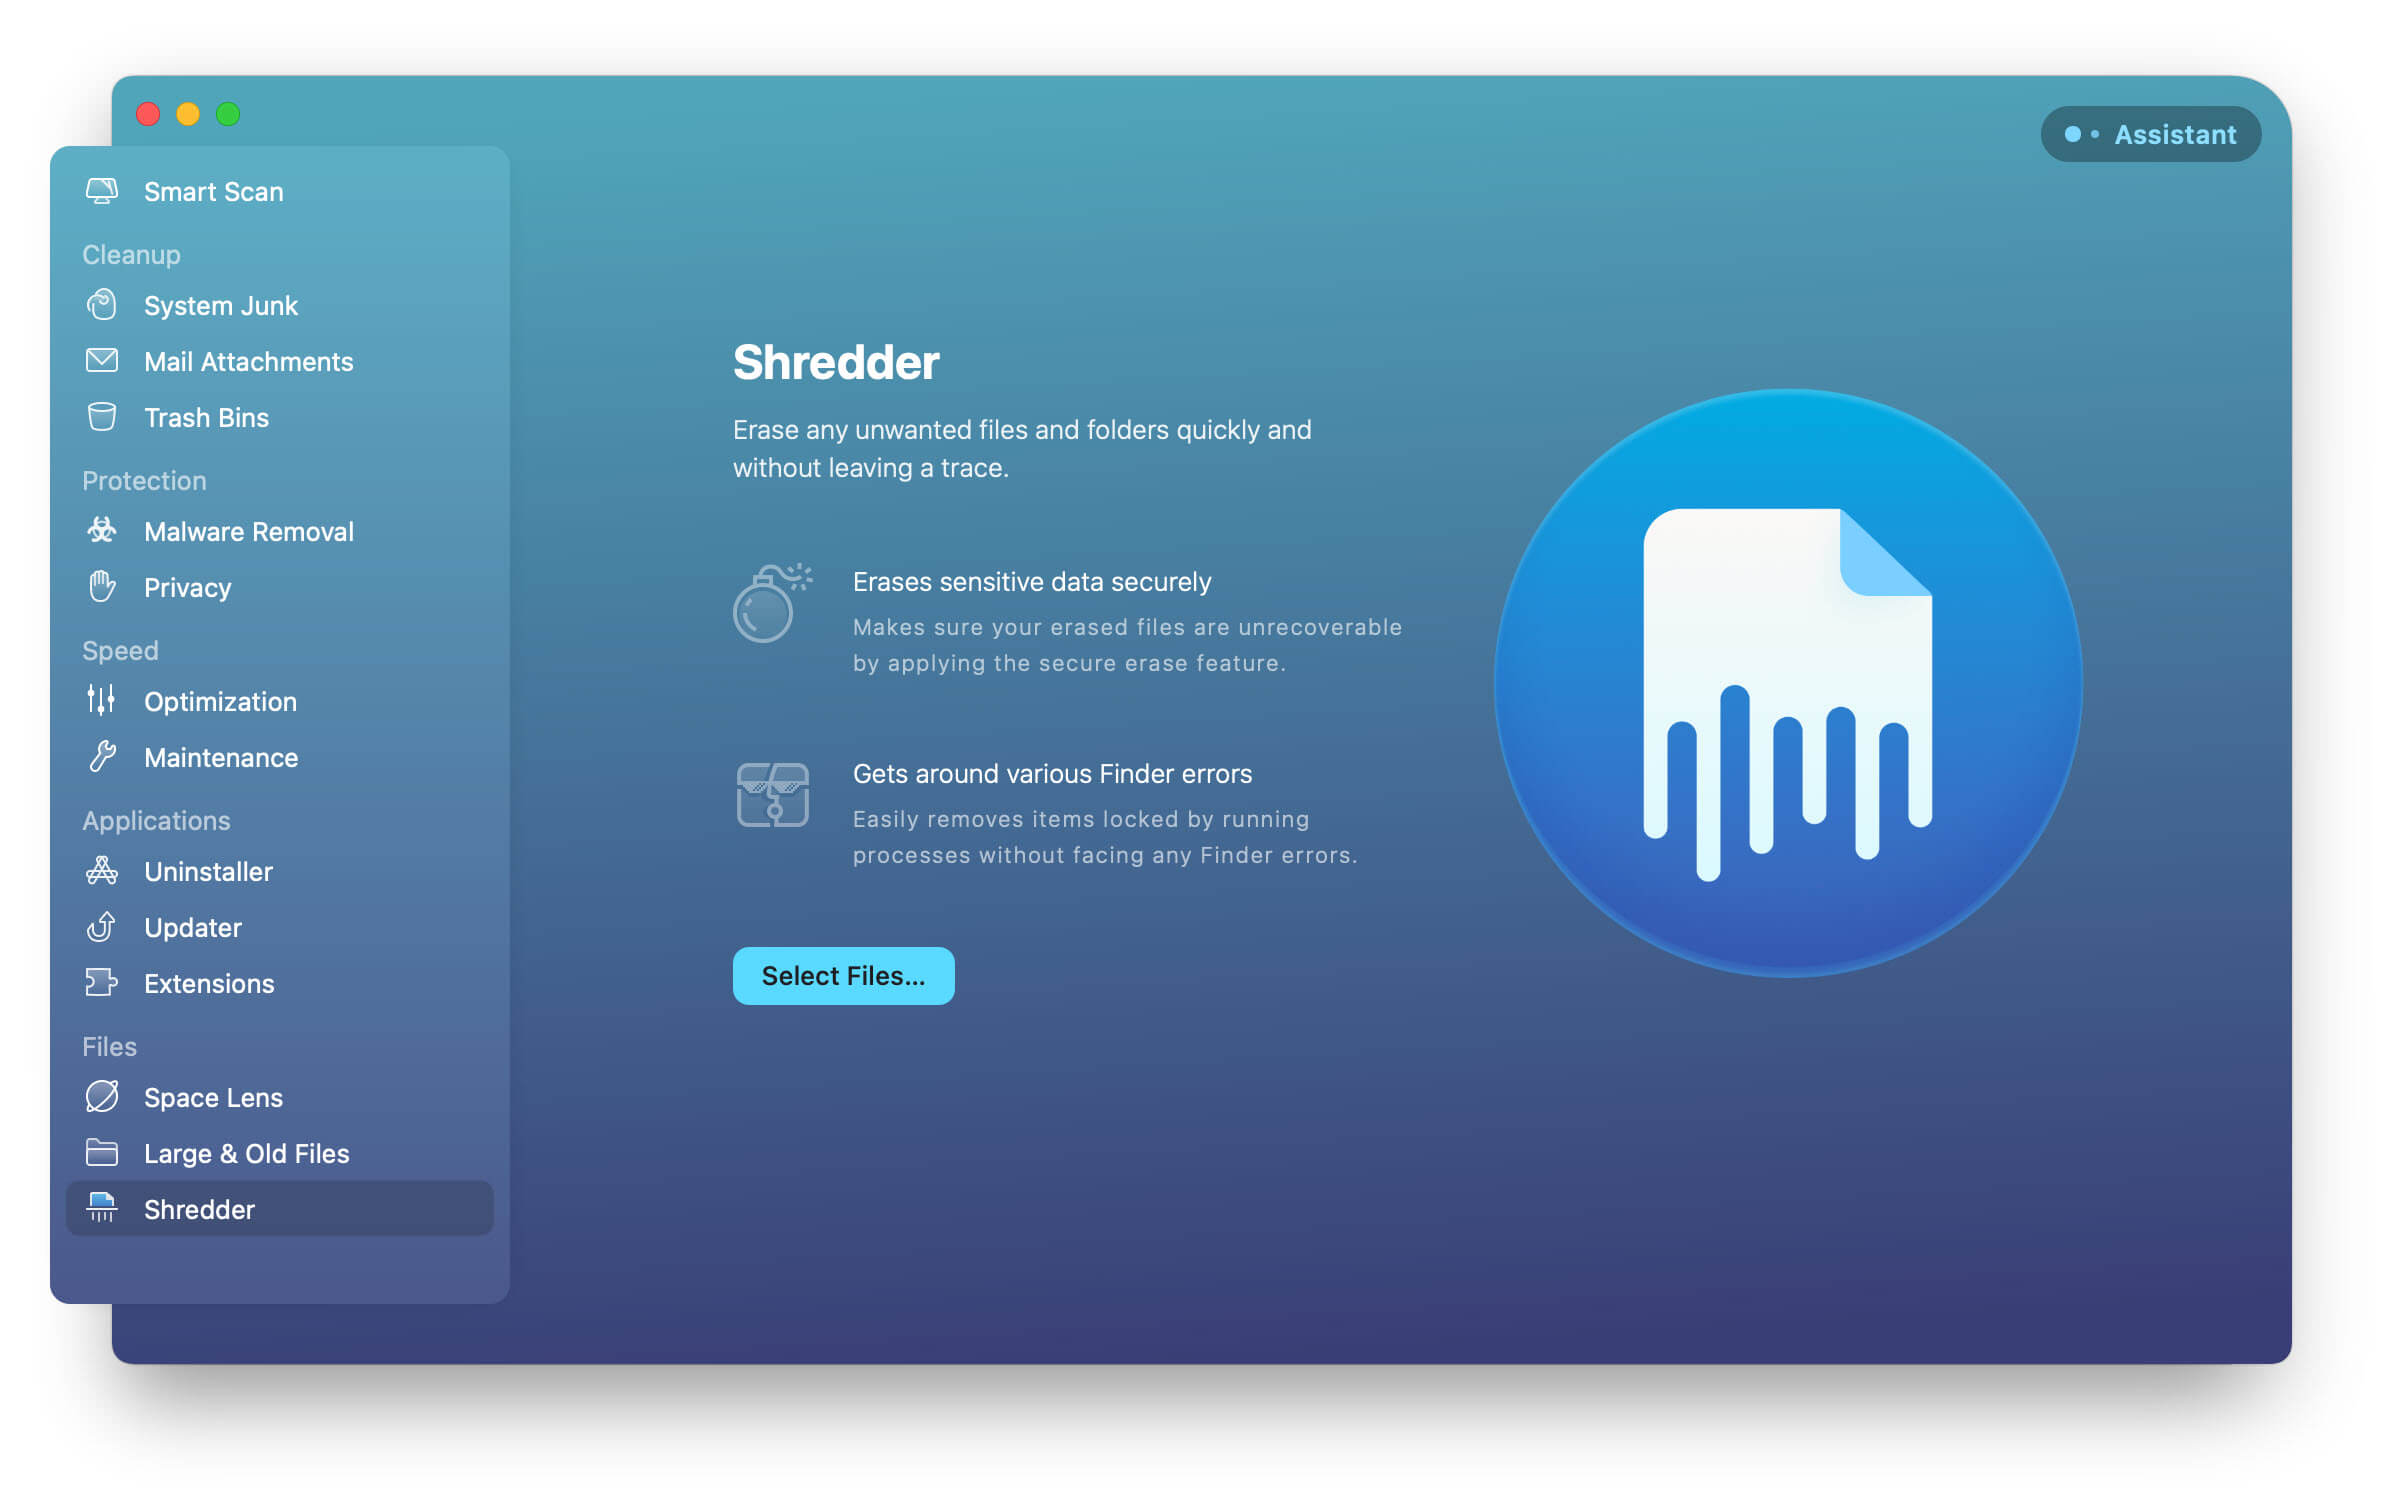
In the “Shredder” window, drag and drop the screenshot (or screenshots) you want to delete into the window.
Now click on “Shred” and the screenshot will be permanently deleted from your Mac.
CleanMyMac X is a powerful tool that can also help you free up storage space on your Mac in other ways. It can remove large and old files, unused apps, and much much more. So if you’re looking for a way to clean up your Mac and free up some space, give it a try.
There you have it – a quick and easy guide on how to delete screenshots on Mac. By getting rid of unwanted images, you can declutter your desktop and reclaim space on your computer.