
We’ve all been through this, you got distracted just one second and hit delete. Sometimes it’s intentional, you thought the final version was final, and then it wasn’t, so now what? Maybe you think that deleted files are lost forever, let me tell you this is not quite so, they’re still in there, and to ease your mind I can tell you for sure there are several methods you can use to recover deleted files on Mac even after you’ve emptied your trash bin.
In this article, you will find several ways you can restore and recover your deleted files on Mac, ranging from the easy level of difficulty to “hard to recover from”.
Here’s What You Need to Do to Retrieve Your Deleted Files
Option 1. Recover files manually when you haven’t emptied the trash bin.
In the unfortunate event of deleting files that you later need to recover, be aware that they first go to the Trash bin, this means that you could go straight to the trash bin and restore them as shown in the following image, to do so you need to select the “Put Back” option and that should place your file back to where it was originally located when you first deleted it. You can find the trash bin Icon located in your dock, which is located on your desktop, if you don’t see your dock just hover your mouse in the bottom part of your desktop, and it will appear again.
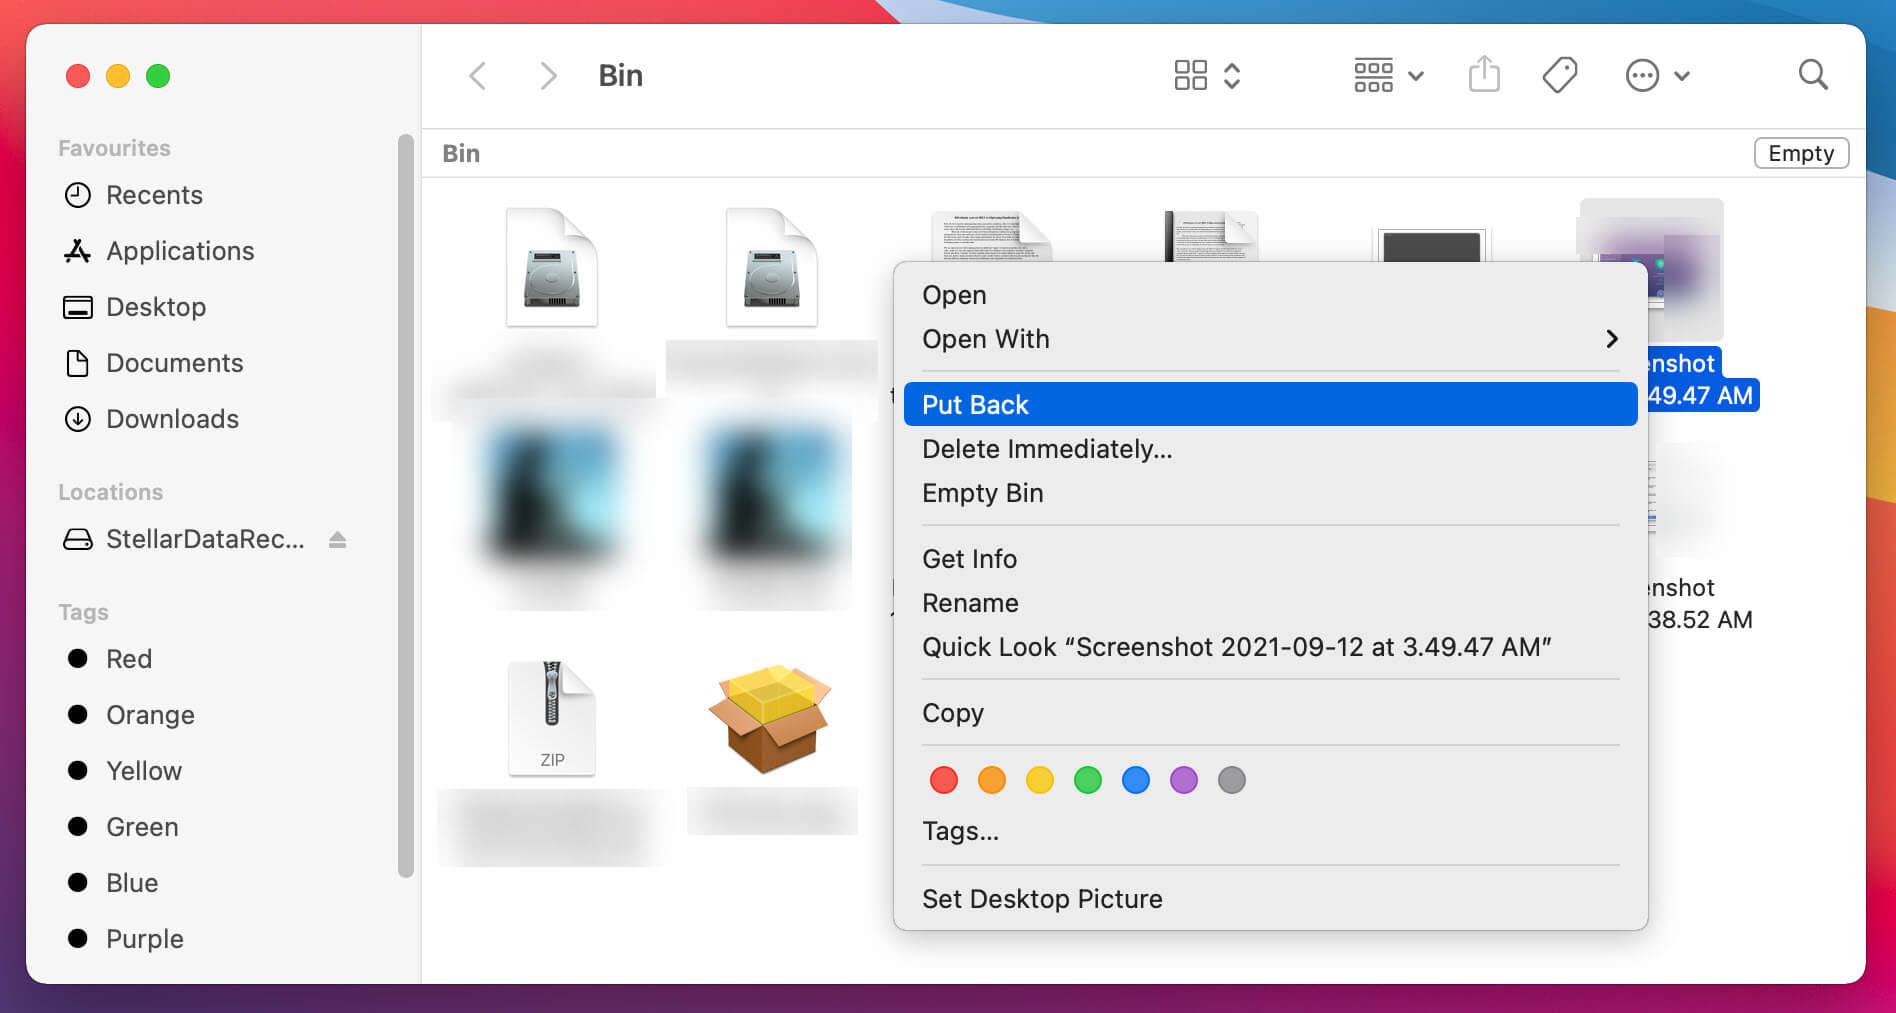
This method of recovery is the best scenario possible, and it is easy because the file hasn’t yet been “permanently deleted”, which is why you only have to retrieve your file from a temporary file holder which is the trash bin, but you need to know that physical storage drive keeps the file until it is overwritten, once this has happened you need to use other methods to retrieve those files from your Mac.
There is a second option to this “easier” method, but it requires owning a specific device. If you have a Time machine, Mac offers a built-in feature to back up your files and the steps to retrieve those deleted files would be as follows:
- Connect your storage device which contains the backup, naturally, this will also contain the file you are looking to recover.
- Next, you need to open the trash and select the icon on your computer menu bar to choose the option “Enter Time Machine”. This will allow you to do the same for any other folder or file you have previously deleted, for example, if you had the file in your “Downloads” folder you could open the Time Machine and go to that folder to restore it.
- In the Time Machine, there will be a list of available backups, you can select the one you need and restore it from there.
This method though will not work in the case that you do not own a Time Machine. In this case, you would have to find an alternative way to fix this situation with an alternative method, which will be discussed next in this article.
Option 2. Data recovery through specialized software.
When you’ve discovered, you have accidentally deleted your files and also emptied your trash bin. The best possible solution, in this case, is using specialized software to recover files on a Macintosh that guides you through this process. For the purpose of this article, I would like to recommend Stellar Data Recovery, you can download it from their website, and it’s free up to 1 GB of data recovery.
The steps you need to take in order to restore your files using this software are the following:
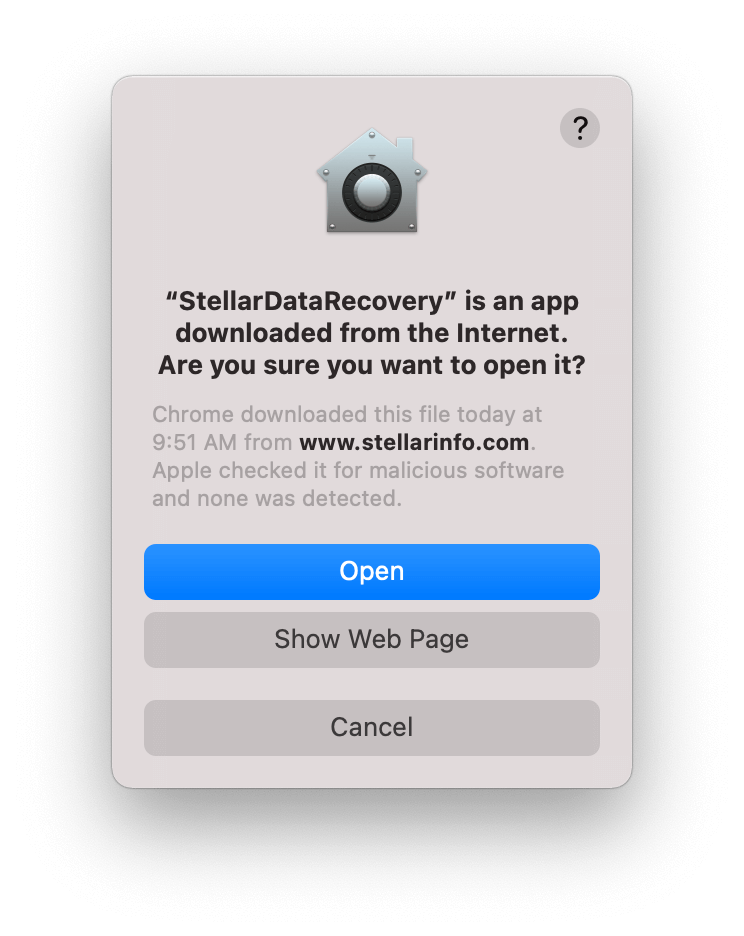
First, you need to visit the website and download the software, Stellar offers a free version, but you can also choose another of their paid versions which have useful tools like repairing corrupted or damaged videos, images, and videos, recoveries from DVD’s, creating a recovery drive, just to mention a few of their features. Their prices range from free to $149 for a 1-year subscription. Once you’ve downloaded the installation file and double-clicked on it, a window will pop up, and you will be asked to drag the file to your applications folder.
Professional Edition Download


After you’ve dragged the file icon to your Applications folder, you will get a warning that you are opening a file downloaded from the internet, when you agree to this, then you’ll be prompted to agree to the license agreement and the software will initialize. As you can see, everything is pretty straightforward, and you should not struggle too much to follow the procedure.
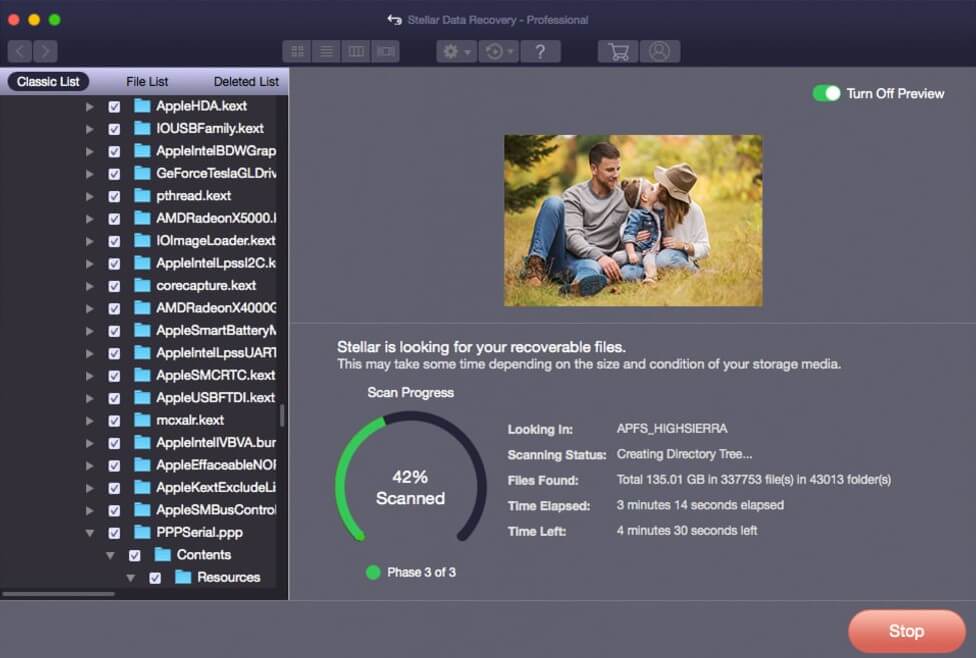
The software immediately initializes, and then you quickly get an interface to start working to recover your Mac files recovery.
So for a final wrap up on how to recover your deleted files on Mac using Stellar Data Recovery Pro:
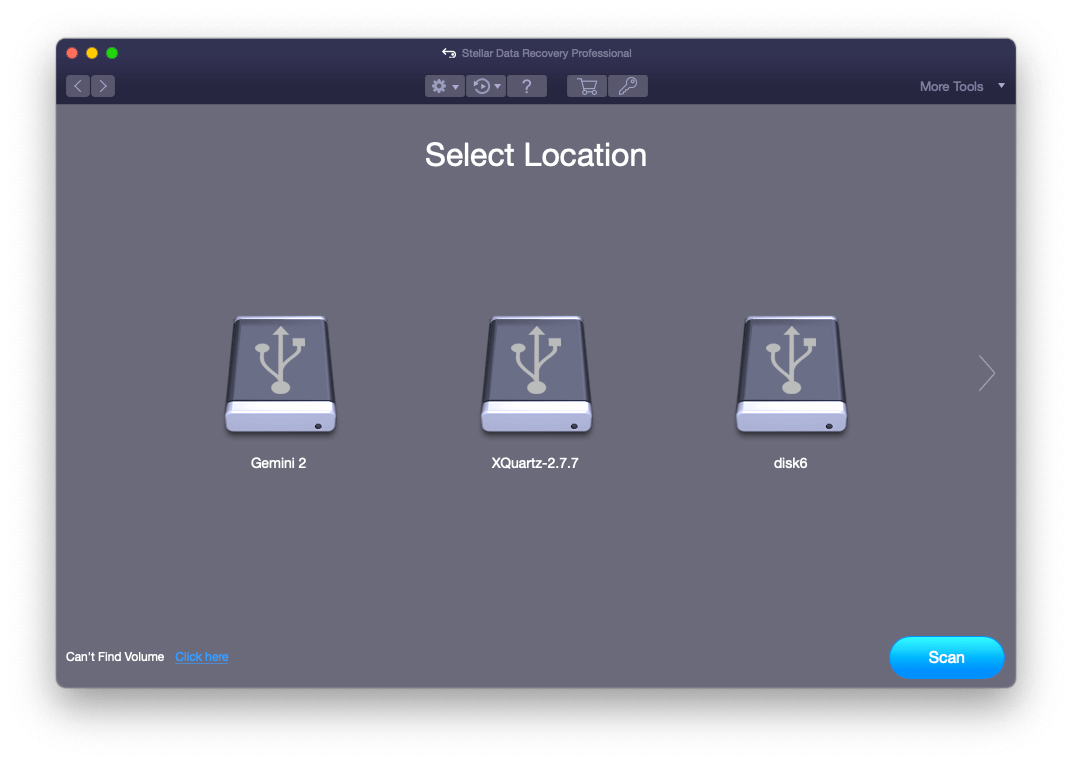
- First, select the file type of the data you want to recover.

- After you select the location, when you’ve clicked on the start-up disk or location, you should then click Scan.
- Finally, all you need to do is preview the scanned files and click
Option 3. There is still another method to recover your files, Macintosh computers have a feature to “undo” to undelete or restore deleted files, the issue with this option is that you only have a small window of time to do this, meaning, you have to use this option immediately after deletion. Another issue is that you can’t use it if you’ve deleted your trash bin. If you’re lucky enough to comply with these requirements, all you have to do is simply click on the Undo Move option, which is at the top inside the Edit menu. Remember, this option is only available right after deleting the file.
Option 4. For those of you who want to venture into a little programming, Macintosh operative systems will allow you to enable hidden files through commands using the Terminal. All you have to do is press Command + Space and type “Terminal”, it will open a command prompt, paste these lines, and hit enter after each one. It’s not really programming as much as running a few pre-set codes, but it feels like it, and it’s always cool looking into the deeper layers of computers and how they work, which is what a command prompt does for you.
killall Finder
Not everyone feels comfortable going all the way to writing a few lines of code, and there is also the issue that you might not be sure what to delete and what to keep, for this reason, the safest and more comfortable way of going about recovering your deleted files on Macintosh are the methods mentioned before.
If you updated to Sierra or later OS…
You could also use the SHIFT+CMD+. Hotkey. This will enable all hidden files not only the ones you’ve deleted, and as the previous method it makes some people unsure on what to delete and what to keep, but hey! It’s yet another option.
Hopefully, you will find this article useful to recover your deleted Mac files, from these options there are still a few shortcuts out there, just make sure that whichever option you decide to use is safe and easy for you to do. These step-by-step options are tried and proofed, but you still might find a few minor differences depending on the version of your OS and the recovery software you decided to use, please make sure to take a look at Stellar before other software as it is a very robust and friendly software that helps you retrieve your information painlessly and safely.
Professional Edition Download