Recuva has always been known as one of the best software available for recovering data… But can it work if I’m using a Mac?
The simple answer is NO. There is currently no version of Recuva available for Mac computers. This software is designed to work with Windows operating systems and does not have a Mac equivalent.
There are, however, some things you can do if you’re using a Mac and need to recover data. One option is to use a different data recovery program that is compatible with Mac computers.
While Recuva cannot be an option for Mac users, there are still plenty of other great data recovery tools available that can get the job done, including:
- Stellar Data Recovery for Mac
- 4DDiG Mac Data Recovery
- Recoverit for Mac
- EaseUS Data Recovery Wizard for Mac
These are all compatible with the macOS operating system and might help you get your data back even if it has been erased from the trash bin.
No matter what application you choose, it’s important to remember that the sooner you start the data recovery process, the better your chances are of being successful.
But wait! Before you try any of these programs, make sure to first use Time Machine, which is Apple’s built-in data backup software. Time Machine can help you restore deleted files or folders, as long as they were backed up beforehand.
Time Machine Is Your First Line of Defense Against Data Loss
On a Mac, the first thing you should do when trying to recover lost data is to check Time Machine. Time Machine comes with every Mac since OS X Leopard in 2007 and was designed to help you restore files that have been changed or accidentally deleted, as well as those that got lost due to a system crash or virus infection.
It regularly backs up your computer, including applications, photos, documents, and the entire system itself. Not only can you restore your Mac back into its previous state with all of your data intact – but also allow you the choice of recovering just a certain historical version of a file, which is really useful if you accidentally saved over something or made changes that you didn’t mean to.
Sounds great! Yes but but in order for Time Machine to be able to help you, you need to have it turned on and configured before you actually need it, otherwise it won’t have any backups to fall back on.
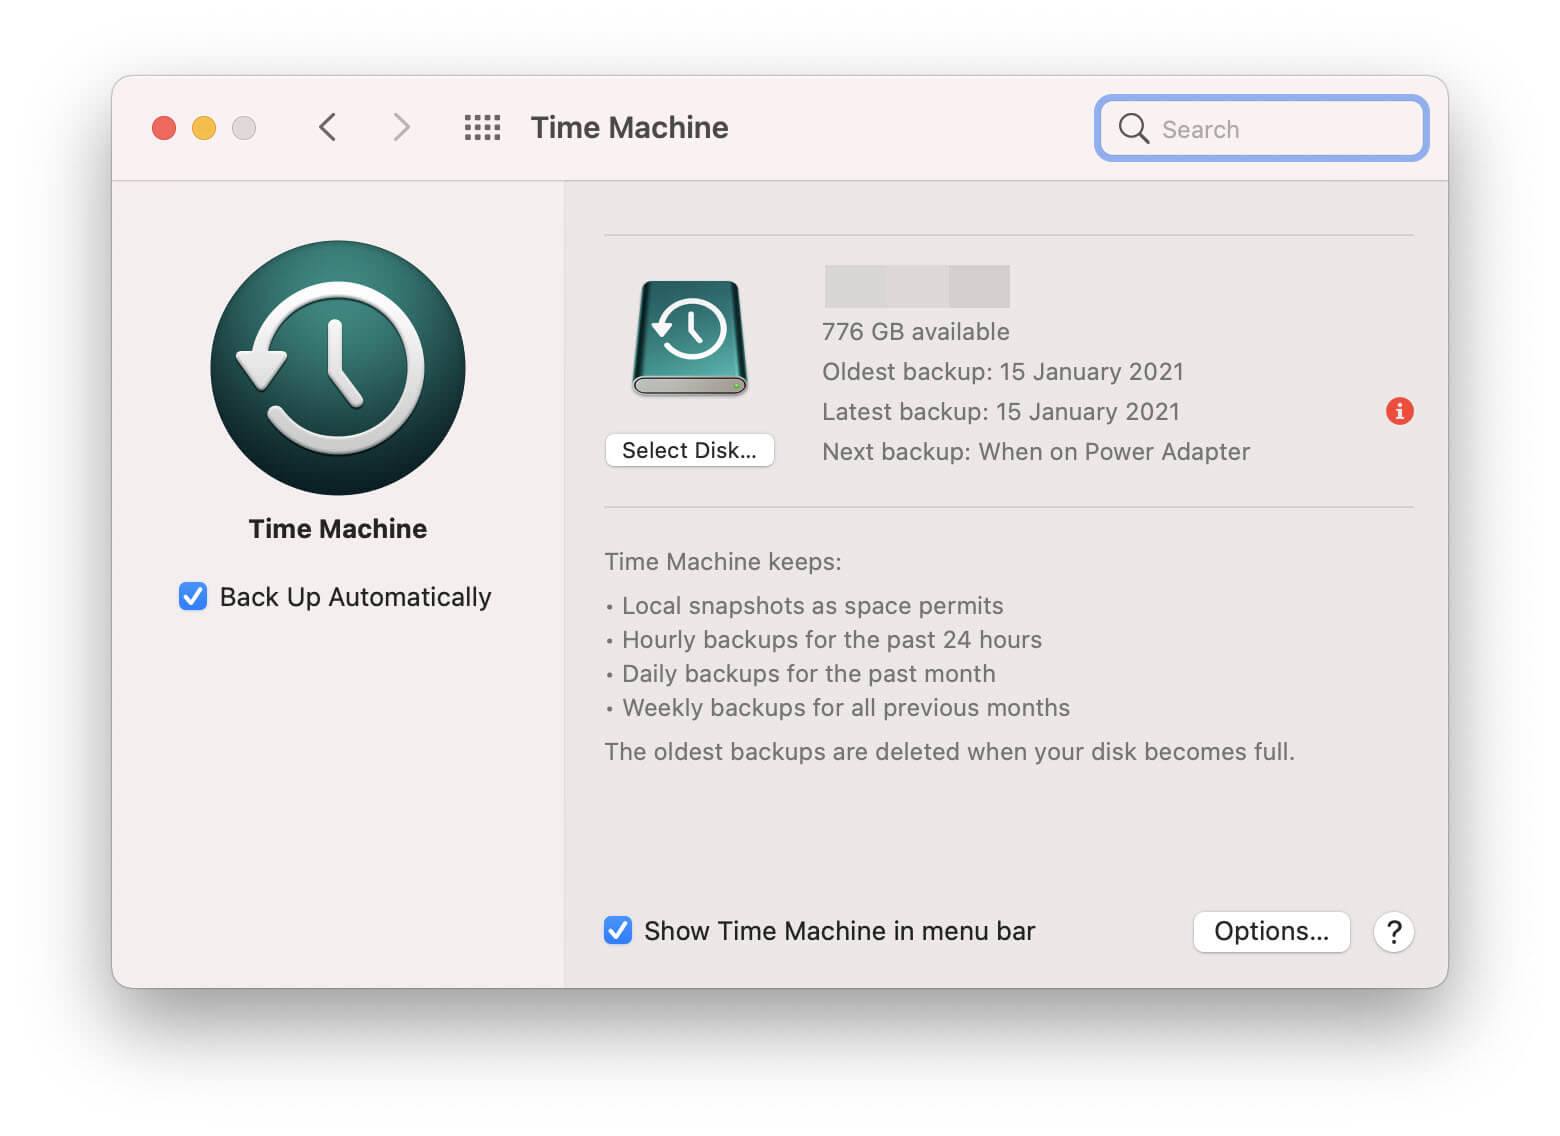
As long as you’ve made regular backups using an external hard disk or other device and the “Back Up Automatically” button has always been switched on, you’ll have a good chance of retrieving your data. Even if the external backup drive is unavailable or damaged, you will still have some of your data on hand thanks to Time Machine’s “Local snapshots as space permits” function. Local snapshots mean it can keep recent backups on your Mac instead of requiring them to be stored on an outside hard drive.
To see if you have any local snapshots available,
- Go to the Time Machine preference pane in “System Preferences” and check the “Show Time Machine in menu bar” box.

- A tiny clock icon will appear in the top-right corner of your screen; click on it and select “Enter Time Machine”.

- In the window that appears, you can browse through your backups by date and time to find the one that contains the files.

- Once you’ve found the backup you’re looking for, simply click on the “Restore” button to have it copied back to its original location.
If the local snapshots aren’t giving out what you need, connect your external backup drive to get more. It’s always a good idea to keep your Mac backed up.
A cruel reality, however, is that sometimes Time Machine fails. Backups may not have been made for a while, or the backup drive can become corrupt, preventing you from accessing your backups. If this is the case and you’re stuck without a Time Machine backup to rely on, then you may have to turn to one of the data recovery programs mentioned earlier.
Best Alternative to Recuva for a Mac Computer When Time Machine Has Failed You
When Time Machine is unable to help, the next best thing is to use one of the many data recovery programs out there.
It’s important to note that you should stop writing or saving new data to the drive that you’re trying to recover data from. The more you use the drive, the greater the chance that you will overwrite deleted files and make them unrecoverable.
There are many Mac data recovery programs available, but we recommend using Stellar Data Recovery as it is one of the most comprehensive and user-friendly options. It offers an easy-to-use and intuitive interface, as well as a wide range of features that make recovering lost data a breeze.
Stellar Data Recovery Professional Edition Free Download
Even if you’re not particularly tech-savvy, Stellar is an excellent choice as it doesn’t require any special skills or knowledge to use effectively. Simply launch the program and follow the on-screen instructions – it really is that easy.
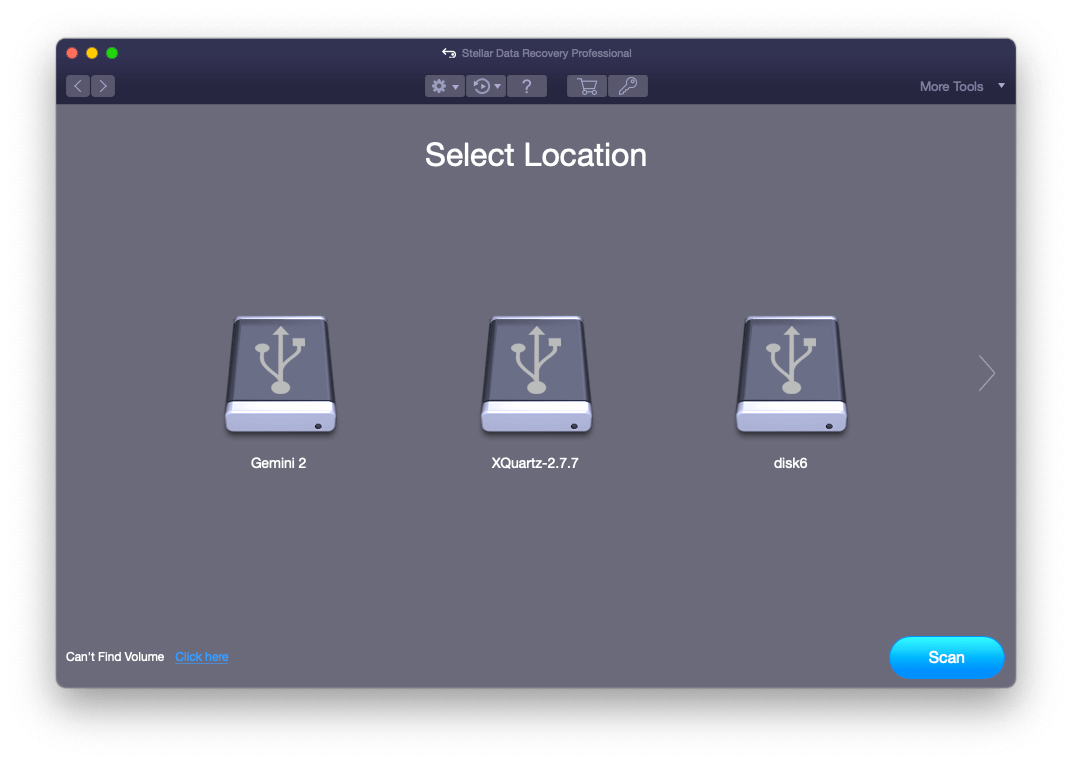
Once you have installed and launched Stellar Data Recovery, you will be presented with a variety of media types to choose from as well as a list of drives and devices that can be scanned for lost data. Select the drive that contains the lost data and click “Scan”.
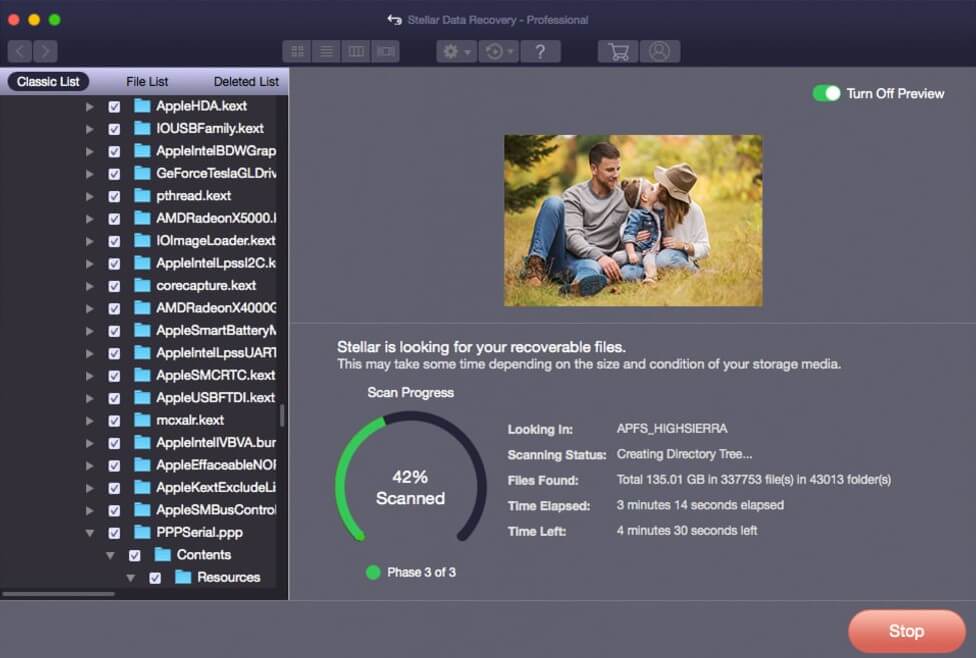
The program will now scan the selected drive for any recoverable files. This process can take a while, depending on the size of the drive and the amount of data that needs to be scanned.
Once the scan is complete, a list of all recoverable files will be displayed. You can preview most types of files, including photos, videos, and documents, to check that they are indeed the ones you’re looking for. Once you’re satisfied that the recovered data is what you need, simply click “Recover” to have them saved to a location of your choosing.

Stellar Data Recovery is available for both Mac and Windows, so whatever your computer’s operating system, you can use it to recover lost data with ease.
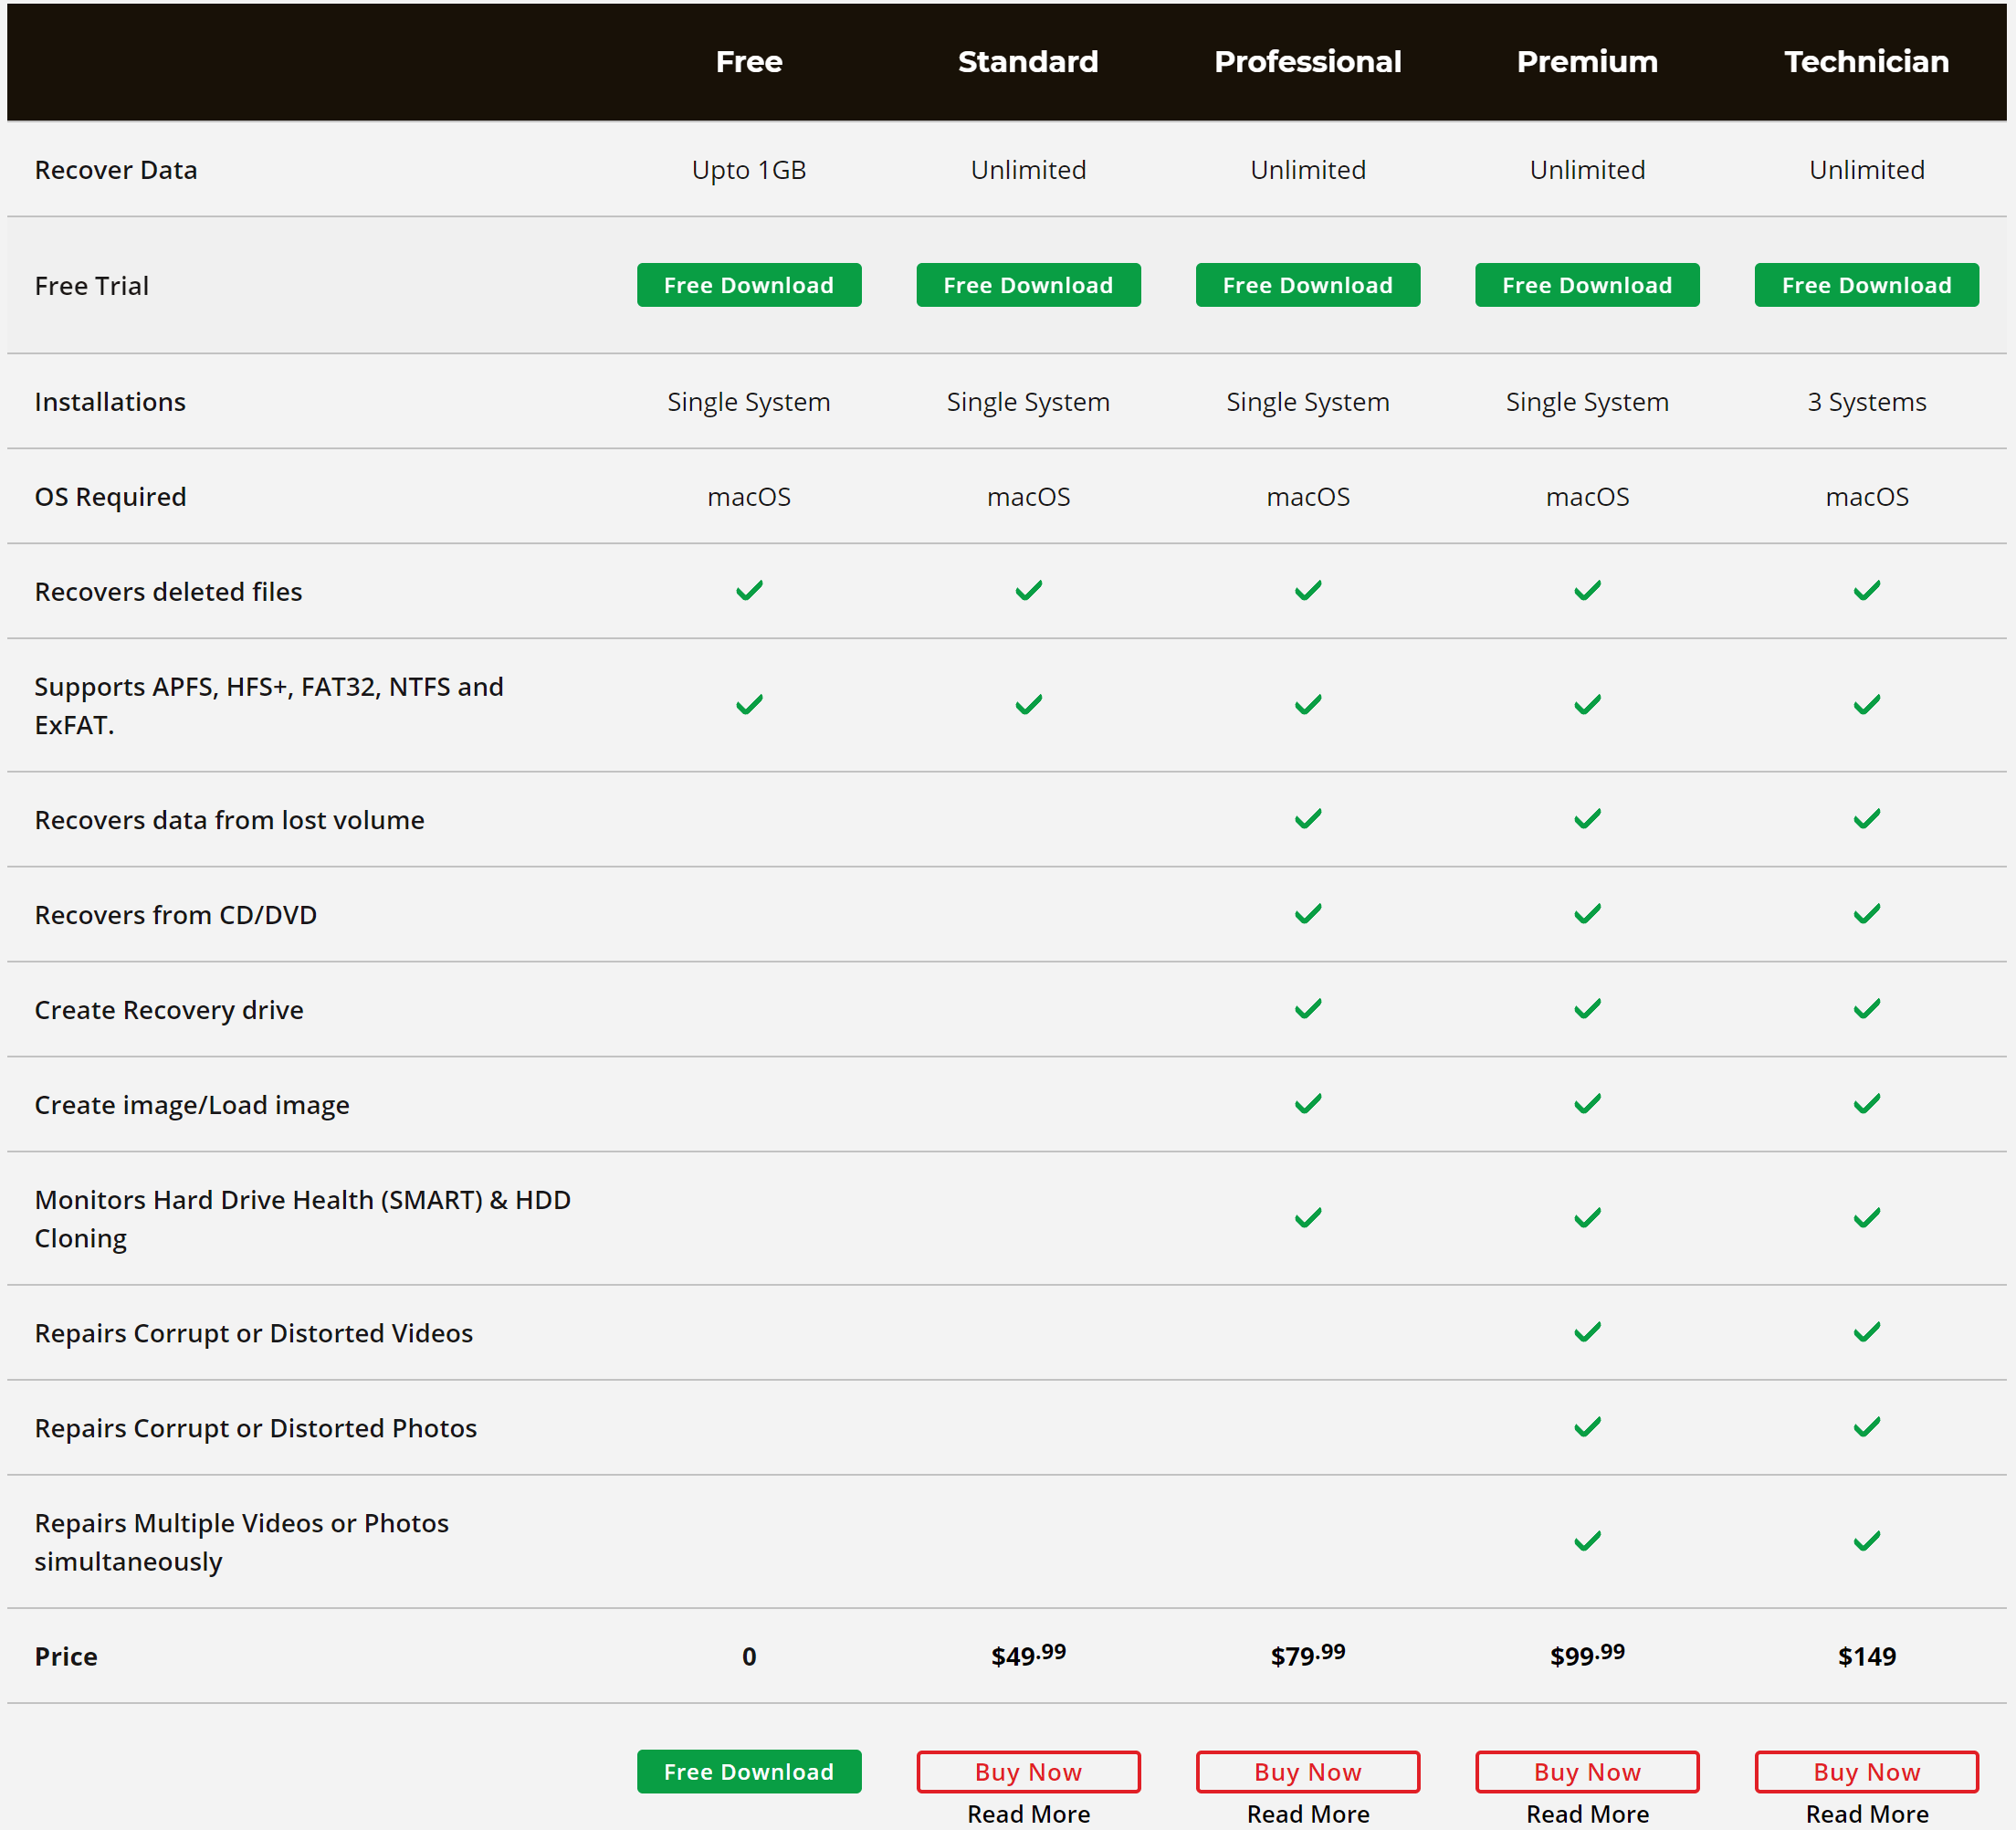
On Mac, Stellar provides four editions (which are Standard, Professional, Premium, and Technician), with each one having a free trial so you can try out the program before you decide to buy it. This is a great way to see just how easy it is to use and whether or not it will be able to recover the data you need.
As always, we recommend that you back up your data regularly to avoid having to rely on data recovery programs. Time Machine is an excellent tool for this, but if you don’t have a backup available, then Stellar is the next best thing.